Lyne came over to my place today to make cake pops! Thank's to
Bakerella for her inspirations, we were quite successful in our pursuit this afternoon :)
Before Lyne arrived, I managed to put the chocolate cake batter in the oven. Decided that it was best that I use a ready cake mix I bought from the supermarket to save the hassle. After all, it's the decorating part that was more fun *grin* While waiting for the cake to bake and cool down, Lyne searched the internet for ideas of cake pops that we could make, while I prepared lunch. And it wasn't long before our cake was ready:

Fresh from the oven, smells good!

Dry cake crumbles
After crumbling the cake (it was really dry by the way - wonder why it was called super moist cake on the box), it was time to add in the butter cream cheese frosting (I'll put the recipe at the end of this post). I put in a little at a time, careful not to overdo it, and stop the moment it was possible to shape and mould the cakes into the shapes that we want.

Adding butter cream cheese frosting, a little at a time
We started by churning out golf ball sizes, and then various other shapes, such as pumpkin, bells, cubes and egg shapes, trying to keep them as even sized as possible.

Ready to go into the fridge
We only managed to get about 27 mini cakes out of the crumbled cake, we probably could get even more if we make them a little smaller. But the lollipop sticks I bought from ICCA was quite long (6") so it may look a little imbalance if the cakes were small. The size that we made were just perfect for the sticks.
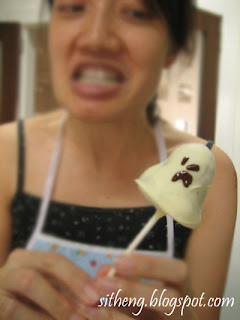
White chocolate coated ghost cake pops
We just couldn't wait to dip those balls into the chocolate coating! As soon as we finished lunch we took out several bowls and melted some white chocolate in the microwave. I also tried to use Candy Melts by Wilton, but it was just too thick to coat the cakes evenly. I had to add some vegetable shortening to thin it a little, but then I realised that it took a longer time to harden if shortening was added. Still found that white baking chocolate was best in this case. I also used some gel food colouring (you'll need oil based food colouring to colour your chocolates).

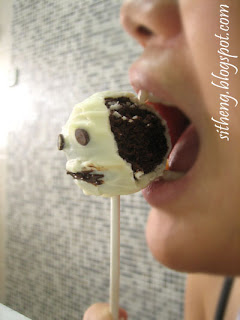
Our first attempt at cake pops - successful!
Seriously we were both laughing so much and squealing with excitement each time the cake pop turn out just right! At first we tried to use some food markers to draw faces on them, but it was hopeless. In the end we just used some dark chocolate as a replacement. Works out great!

Cake pops for Lyne to bring home
I think we spent close to 5 hours (including waiting & lunch time) to complete about 14 cake pops. Yes, I know its pretty slow, but this was an experimental session, and so we made a lot of mistakes and that took up some of our time. But we learnt a lot of valuable techniques, definitely. The next time it won't take so long!
What do you do with a mummy so cute? Eat it of course!
Lyne didn't want to take too many home, and it was impossible for me to eat 10 of them! Plus I didn't know how long these babies would last. So I gave them all to my neighbour's kids who were just two doors away and happened to be playing outside at that moment :)

The last 2 cake pops - for my breakfast tomorrow!
I still have some cakes in the fridge, waiting for me to decorate them. I'll try to mix some orange colour tomorrow and see if I could make pumpkins out of them. Here's the recipe to the butter cream cheese frosting:
Ingredients
200 gms icing sugar
100 gms butter
200 gms cream cheese
1 teaspoon pure vanilla extract
BEAT the softened cream cheese and butter together and slowly add in the icing sugar and mix until light and fluffy. I only used about 1/2 of this portion in my cake crumbs, you may need more or less depending on your cake size. The original recipe in
Martha Stewart's website calls for more sugar, but I didn't have that much left in my pantry (thank goodness), and still it came out just nice and not too sweet. Adjust the recipe to your liking.
As for the coating, I simply used white chocolate with some oil based food colouring. Becareful not to accidentally mix water into your chocolate (especially if you are using a baine marie). Other materials I used include mini M&Ms, pretzel sticks, chocolate chips and coloured sprinkles. You are free to use whatever you need, you are only limited by your imagination!


3 comments:
This really look fun!!
Mmmm... I'll surely try this when Abigail is a little bit older. :D
yes, it's really fun! I'm sure Abigail will enjoy crumbling the cake with her hands! ;)
you left out my "tasty" won-tonS!
:p
ah-happy happy HaLlOWeEn!
Post a Comment